1. Software Installation
The steps on this page only need to be completed once per PC.
Installer File Structure
The IRIS installer contains the following files:
| Path | Description |
|---|---|
| Calibration | If you purchased a pre-built IRIS kit, this folder contains the hardware specific calibration data for your kit. This is automatically copied to your computer during installation. |
| Calibration\TetraMic Calibration | This folder contains the calibration data for your specific TetraMic. This is created by Core Sound, and relates to the A-format to B-format conversion process. It is not an absolute level type of calibration. |
| Calibration\Audio Device Calibration | The calibration file for the audio interface included in the kit. This is used to ensure precise matching of input channel gains. |
| Drivers\HASP | The installer for the HASP USB protection dongle |
| Drivers\MOTU 4pre | Contains the installer for the MOTU Audio 4pre |
| Drivers\Zoom F4 | Contains the installer for the Zoom F4 |
| Example Projects | Example IRIS projects |
| Plugins | A plugin for SketchUp which enables IRIS plots to be visualised inside a SketchUp model. |
| IRISSetup.exe | The IRIS setup program for Windows |
Installation Procedure
Drivers
Before installing IRIS software, you will need to install any hardware device drivers, including the USB audio interface and the HASP protection dongle.
HASP Driver
IRIS licenses are typically delivered on a HASP USB protection key. Before connecting the key, run the HASP installer HASPUserSetup.exe delivered with the installer.
Tip
The latest driver can be obtained by downloading Sentinel HASP/LDK - Windows GUI Run-time installer from here. Select Sentinel LDK RunTime & Drivers and then Sentinel HASP/LDK Windows GUI Run-time Installer.
It's also available to download directly here (version 7.103, obtained May 2020).
Note
IRIS software will run as a viewer if no licence is detected.
USB Audio Interface
A Revision 1 IRIS kit includes a MOTU 4pre USB audio interface, and the Revision 2 kit uses a Zoom F4 USB recorder.
Zoom F4
A Zoom F4 can operate in a variety of modes: as a standalone recorder, a USB audio interface, or as a standalone recorder and USB interface at the same time. Please use this combined mode, named AIF with Rec, since this requires the least configuration on site (no menu diving is required to enable it every time you power the unit on, unlike the other USB modes). AIF with Rec mode is fixed to a sample rate of 48 kHz.
-
Please update the Zoom F4 firmware to F4 System Version 3.0 or newer to enable the AIF with Rec mode. This update and instructions may be downloaded from the Zoom website.
Note
F4 units delivered with IRIS kits will already be running the latest firmware.
-
Install the ASIO driver for AIF with Rec mode by running
ZOOM_Audio_Interface_with_Rec_ASIO.exe. It may also be downloaded from the Zoom website, listed as:
There are several different ASIO drivers available to download, so please take care to install the one above.
MOTU 4pre
-
Do not connect the 4pre to the computer yet.
-
Locate and run
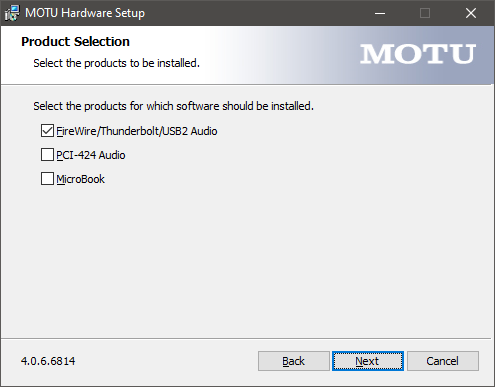
SetupAudio.exein the MOTU 4pre driver folder in the IRIS installer. -
When prompted, ensure Firewire/Thunderbolt/USB2 Audio is checked, as shown.
-
Once the driver has finished installing, connect the 4pre to power and a USB port on your computer.
-
Power it on (single press the right-most button on the front panel).
-
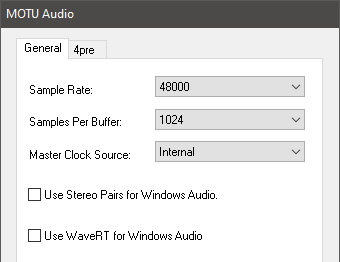
Open the Windows application MOTU Audio Console.
-
Set the Sample Rate to 44100 or 48000 and Samples Per Buffer to the maximum value of 1024.
IRIS Software Installation
-
Check your computer is connected to the internet so the installer can fetch any necessary dependencies.
-
Run
IRISSetup.exeto install -
The installer may update the .NET Framework and C++ runtime. Follow the prompts to install these. You may have to restart your computer during this process, but setup will continue afterwards.
-
The IRIS installer will now launch. Follow the prompts to install.

Tip
After installation you can find IRIS software in the Start Menu.
Note
If you ran IRISSetup.exe in its original location (next to Calibration folder), the installer will deploy the calibration data for your kit to the correct location on your computer. When you run IRIS for the first time it will automatically select this calibration data.